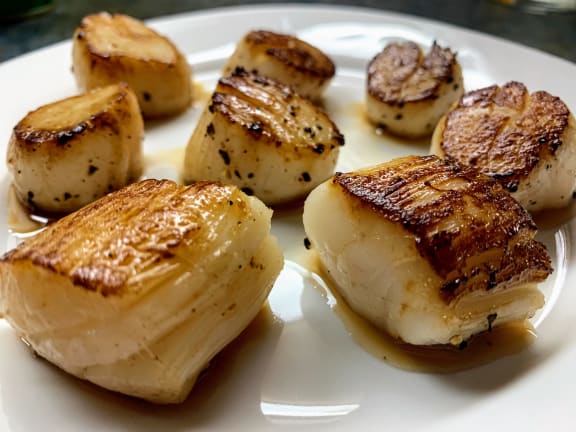
Look beyond the frying pan and into the oven: the broiler is your lowest-maintenance, most reliable friend when it comes to cooking sweet, succulent weathervane scallops. There’s no flipping required, no hot butter or fat spattering out from a pan, and broiling is such a high heat cooking method that broiled scallops are usually done cooking in 5 minutes or less.
Beyond ease, one of the main advantages of broiling your scallops is that you can load them up with something that will caramelize into a golden topping as it gets blasted with heat, an arrangement that allows you to play around with elements like breadcrumbs, miso, shallots, sugars — basically anything that transforms under heat into something magical. Take your pick.
Here’s a foolproof guide for how to broil weathervane scallops.
Setting Up
You need to use a proper broiler that gets hot enough to facilitate caramelization of both the scallops and the miso butter in order to properly broil them. That means using a broiler in a real oven, not the one in your toaster oven that merely approximates the blast of intense heat that you are looking for in this cooking method, especially with seafood like weathervane scallops.
Make sure your oven rack is as high up as possible before you turn on the heat. This usually sets up your weathervane scallops to be 4 to 6 inches away from the broiler element, which is far enough that they won’t burn but close enough that they will get a relatively direct blast of heat.
Don’t get impatient in the preheating stage. You really want your broiler to be as hot as it gets here.
Meanwhile, pat your scallops dry, then arrange them in a baking dish or on a cast iron pan. Avoid crowding the pan to ensure that they’ll cook evenly. Top each scallop with a schmear of miso butter, spoon melted shallot butter evenly over the dish, or breadcrumbs tossed with parmesan and olive oil. Season with salt and pepper to your liking, if they’re not already seasoned.
A Quick Broil
Slide your pan of scallops beneath the broiler and set your timer for 3 minutes. After 3 minutes is up, take a peek to see if the scallops are picking up any color. Ideally you’ll want to see some caramelization on the scallops themselves, as well as any other components that you may have slathered on top. Smaller scallops may need to come out now so that they don’t become overcooked.
However, if the scallops are still looking a little pale, or if they all seemed to be particularly plump, leave them in for an additional minute. This should give them plenty of time to cook through inside while developing a little crust of texture on the exterior. You generally won’t need more than 4 minutes for the scallops to finish cooking. Even if they’re not as browned as you’d like, they need to come out: There’s nothing less disappointing than an overcooked scallop.
Serve immediately while the weathervane scallops are piping hot, with a wedge or two of lemon or lime on the side.
Broiled Weathervane Scallop Ideas
Try our recipe for Miso Broiled Scallops. Southern Boating’s simple recipe for scallops with parmesan breadcrumbs includes a touch of Italian seasoning to add some savory complexity to the dish. For even more complexity, you can try out Martha Stewart’s recipe for broiled scallops, which has you poaching the scallops first, then slicing them thin to maximize surface area under the broiler — serving the scallops on the half shell, if you can get your hands on some pretty ones, is optional but adds some drama to the presentation.


