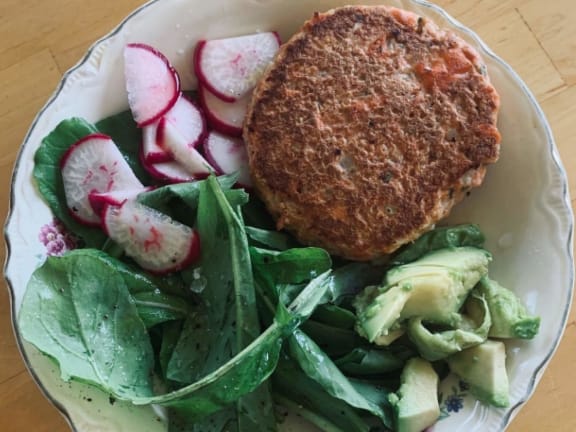
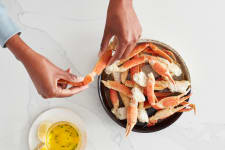
Fish cakes made from wild-caught seafood are the perfect rainy day meal. They’re adaptable enough that you don’t have to leave the house to gather any additional ingredients, yet healthy and delicious enough that you’ll look forward to eating them even on sunny days.
You can basically make them with anything you have in your kitchen, ingredients that you have available right now. As long as you have wild-caught fish and a few kitchen essentials, you can make fish cakes even when the cupboards are a little bare.
Here’s how.
Pick Your Protein
First things first. What type of fish do you have in your fridge right now that is thawed, already cooked, or even frozen? Whatever it is, that’s going to be your base for fish cakes.
You’ll ideally want at least 6 ounces of seafood or so to work with to make it worth it — approximately one portion’s worth of fish, which will produce about 3-4 appetizer servings or 1-2 entree servings of fish cakes, depending on what you’re serving with them and how hungry you are. Double up if you think you’ll want more, and don’t worry about making too much — leftover fish cakes are a great ready-to-reheat-and-eat meal to have in your refrigerator.
You don’t have to have an exact measurement of seafood — just eyeball it to get an idea of if you have a fillet’s worth of fish, a fillet and a half, etc. Honestly, even 3 ounces of fish is fine to use, but you’ll probably wish you had made a bigger batch (as it takes roughly the same amount of time to make 3 ounces as it does to make 12 ounces).
The next decision you’ll want to make pertains to the texture of your protein. Cooked fish will always be flaked (or chopped), while uncooked fillets can be diced, finely minced, or ground. How you decide to break your protein down is completely up to you.
For reference, a fish cake made with diced fish will give you more to chew than one made with ground fish (though the both will be tender). Cakes made with flaked fish have a more substantial bite, but also can seem drier in texture since the proteins in the fish were already set before being turned into a fish cake. We suggest trying each approach to figure out what you like best.
Here are a few examples of what you might end up using for your fish cakes:
- A thawed fillet of Pacific cod, processed until finely minced
- A baked fillet of Pacific halibut, flaked
- A pack of ground sockeye salmon
- A frozen fillet of coho, quick thawed, skinned, and diced
- A couple grilled skewers of marinated sockeye and halibut, flaked and combinedPick Your Defining Ingredients
Next, what do you have in your pantry, spice rack, and veggie drawer that will define the flavor profile of your fish cakes?
You can put as few or as many different ingredients into your fish cakes, but for a no-fail approach, it helps to think of your culinary creation as having a beginning, middle, and end, a flavor story that is told by three ingredients. Choose an aromatic base, a fresh flavor, and a distinctive ingredient that completes the story.
Whatever you decide to put into the fish cake mix, avoid choosing anything that will add too much moisture to the cakes so that the mix doesn’t become too loose; you want it to be just moist enough to be easy to handle. Also, note that your ingredients should be chopped or processed finely that they don’t prevent your fish cakes from holding together.
Here are a few examples of ingredients that you can mix and match from each category:
An aromatic base (anything in the allium family works well):
- Onion, finely diced
- Minced garlic or garlic powder
- Scallions, thinly sliced
- Shallots, minced
Something fresh:
- Fresh ginger, grated
- Cooked spinach, drained and chopped
- Cremini mushrooms, finely chopped
- A handful of tender green herbs
- Sweet or spicy peppers, finely chopped
Something that completes the story:
- Curry paste or powder
- Dijon mustard
- Ras el Hanout
- Chipotle mayo
- 5-spice powder
Also, consider a sauce to serve with your fish cakes once they’re cooked:
- Ponzu
- Tartar
- A wedge of lemon (not a sauce, but you get the gist)
- Harissa
- Basil pesto
Pick Your Binders
One thing you’ll always need for fish cakes is an egg. The proteins in the egg will help bind together your fish cake mix as it cooks. Think of it as your glue: Without it, your fish cakes are going to fall apart.
At minimum, you’ll want to use one egg for every pound or so of fish so that you have enough “glue.” More is fine, though. We’ve used one egg to bind together 6 ounces of fish and produced great results, but if you prefer you can whisk the egg first and just use half of it, reserving the remainder for another use.
As an egg-free alternative, you can use a flax or chia “egg” substitute that vegan bakers use in place of a chicken egg. Both become gel-like in consistency and can be sticky enough to bind together your protein mix, but your finished fish cakes won’t hold together nearly as well.
In addition to the egg, you’ll want to add another binding ingredient to help give the fish cake form. A classic choice is breadcrumbs, but you could integrate crushed up crackers, almond flour, or even mashed (or smashed) potatoes into your fish cake mix. Not only will these ingredients help to hold your fish cake together; they’ll help to keep your cakes from becoming dense pucks of protein.
Get Combining
In a mixing bowl, combine your protein with your defining ingredients and an egg (or half an egg or two of them, depending on how much you’re making). Don’t forget to season now with salt and black pepper. Then, begin to add in your other binding ingredient, a little bit at a time. The goal is to try to use enough of it to give your mix some shape; using a bit too much panko/almond flour/mashed potatoes/etc. won’t hurt your fish cakes, but these ingredients will begin to deaden some of the other flavors when you overdo it.
One important note on mixing your ingredients: Don’t be an aggressive mixer! You’re not whisking eggs here. Just combine everything together so that each component is more or less evenly distributed.
Pro tip: If you have time, put your mix into the refrigerator for 30 minutes to chill it. As it chills, it’ll become a little firmer and easier to form into cakes.
Get Cooking
The last thing you need to do is form your fish cakes. The size is up to you, but make them small enough that you can handle them with confidence when you’re ready to flip them in the pan. Form all your cakes now, and set them aside until your pan is hot and ready. If you want an extra crunchy exterior, you can press your fish cakes into a plate of breadcrumbs now, coating both sides.
Heat up a decent skillet over medium to medium-high heat. When it’s warm enough, add a thin coat of a cooking oil that can withstand higher temperatures. If you’re not sure what oil to use, check out our blog post on fat fundamentals.
Once the oil in your skillet begins to shimmer, carefully add your fish cakes to the pan, one by one, taking care not to get splattered with the oil. You should hear a nice sizzle. If it seems like anything is burning or beginning to smoke, turn down the heat. If you’re not getting much sizzle action, turn up the heat.
Also, don’t crowd the pan! Work in batches if you need to. Your fish cakes will likely only need a few minutes per side to become crispy and golden, so working in batches isn’t going to keep you in the kitchen for too long.
When you see the fish cakes getting golden around the edges where they’re touching the pan, you can take a peek to make sure, lifting up a cake with your spatula to see if it’s ready to flip.
Once your fish cakes are done, you can drain them on a paper towel or paper bag if you like. Or, hold them in a warm oven until you’re ready to serve.


